How to Prep Your Backyard for Shed Delivery & Installation

Getting ready to install a new shed goes beyond just making room in your backyard; it’s also about setting the stage for a structure that will serve you well for many years. Whether your shed delivery installation is a few weeks away or you’ve just clicked “purchase,” now is the time to focus on the best way to prep your yard for a shed installation.
From securing permits to choosing the perfect location, clearing the area, and ensuring a solid foundation, every step matters. A bit of upfront effort will go a long way in making sure your shed is sturdy, functional, and ready for all your storage or workspace needs.
Below are the key tasks to prep your backyard for shed installation, making the process smooth and stress-free.
1. Obtain Permits and Permissions
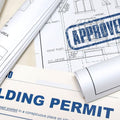
Before you dive into any prep work, you’ll need to do a quick check-in with your local homeowner’s association (HOA) and/or building authority. Different areas have unique rules about things like the size, purpose, siding, roof type, and even foundation of your shed, so it’s worth taking the time to understand the specifics for your location.
Zoning and building codes can vary not just by state but also by city and county, so don’t skip this step. A quick call or visit to your local municipality can save you a major headache later. The last thing you want is to have your shed installed, only to find it’s not up to code.
Bonus tip: Ask about any required permits or fees upfront so you’re fully prepared to hit the ground running.
2. Choose the Installation Spot
Choosing the right location for your shed leads to longevity, hassle-free maintenance, and quick installation. The first thing to look for is high, level ground. Low-lying areas that collect water are a no-go since pooling water can lead to rot, mold, and even termites. If you’re unsure, check your yard after a heavy rain to spot problem areas and steer clear of them.
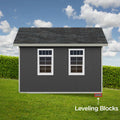
Equally important is leveling the ground for a shed, ideally within six inches of evenness. Uneven surfaces can cause misaligned doors, stability issues, and uneven wear.
If natural leveling isn’t an option when looking for how to prepare the ground for a shed, consider leveling blocks or additional groundwork. For an easier solution, our professional installation package includes leveling services for up to 18 inches, ensuring your shed is stable, dry, and built to last.
A little preparation now means your shed will serve you beautifully for years to come.
3. Know the Clearance Needed Around the Shed
You’ll want at least three feet of clearance around all four sides and above the roofline to make installation, painting, and regular upkeep a breeze. This buffer zone protects your shed from encroaching foliage, helps with proper ventilation, and keeps maintenance tools and ladders accessible when needed.
Consider your long-term needs, too. Will you want to mow around it? Add landscaping? Maybe even power wash it down the line? That extra space lets you tackle these tasks without frustration.
4. Ensure Access to Electricity
To make sure everything runs smoothly during your shed installation, our professionals will need access to electricity within 150 feet of the build site for their power tools. If your shed location is farther from an outlet, consider running an extension cord rated for outdoor use or setting up a temporary power source nearby.
Pro tip: Check ahead of time that your outlets and cords are in good working condition to avoid any last-minute hiccups. Having power ready means our crew can complete your installation efficiently and without delays, so your shed is up and running in no time.
5. Consider Natural Light
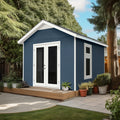
When planning your shed placement, take a moment to think about how natural light will impact the space. If your shed has windows or glass doors, positioning it to capture sunlight can make a world of difference, especially if you’ll be using it as a workspace or hobby area. A well-lit shed not only feels more inviting but also saves you from relying on artificial lighting during the day.
Think about the view, too! Positioning your shed near a garden or open lawn can turn it into a serene retreat rather than just a functional space. On the flip side, avoid placing windows or doors where they might face unappealing sights or your neighbor's yard.
6. Lay a Foundation (Optional)
Building a solid foundation is an important step, but the good news is, it’s not always necessary! Our professionally installed sheds come with sturdy 4x4 pressure-treated runners, meaning you can skip the foundation altogether. Already have a concrete slab from a previous shed? We can install your new shed right on top, as long as the slab is level within ½ inch and large enough to accommodate the size of your shed.
If you’re planning to pour a new concrete slab foundation, just keep in mind it will need some time to cure properly—about seven days—before the shed can be built on top. Patience here ensures a solid, long-lasting base for your shed that’ll stand the test of time.

Keep in mind, if you are building a new concrete slab foundation, you will need to wait 7 days for it to cure before your shed is built on it.
7. Remove Your Old Shed
Shed Liquidators doesn’t provide shed removal services. If there is an existing shed in the location where your new one will be installed, it will need to be removed prior to installation.
You can either take care of the removal yourself or enlist the help of a professional service. Just make sure the area is cleared and ready for our team to begin so you can have a smooth and efficient installation process and avoid unnecessary delays.
8. Clear Space
Before your new shed can be installed, it’s important to clear the area of any trees, shrubs, or other obstacles that could get in the way. If you’d like to keep some greenery around your shed, consider creating a clear path around it to give your installation team plenty of room to work.
Another thing to watch out for is weeds, as they can damage your shed by pushing through its foundation and floor. To prevent this, you can use chemical weed killers, dig them out manually, or lay down horticultural fabric to block their growth. This will help maintain a solid, durable foundation for your shed.

9. Pick Up Paint and Caulk
Once your shed is installed, a little extra TLC is required to keep it in top shape. Within 30 days, you'll need to caulk the joints and paint your shed to protect it from the elements.
The good news is that all our sheds come pre-primed and ready for your custom color, so you get to make it truly your own. While it's an extra step, it’s a great chance to give your shed the personality it deserves. The amount of paint you’ll need depends on the shed's size, and you'll find the exact quantity in the instructions included with your order.
Taking the time to carefully plan where your shed will go and preparing the site beforehand will set you up for success. The effort you put into clearing the space and following installation guidelines will ensure your shed not only looks great but lasts a long time.


